I've made this recipe about a bajillion times by now, they've quickly become a signature item of mine and have been requested at a lot of my functions. Back in January I was given a baby shower, and I decided to make some cupcakes for it. This chocolate cake recipe had been my standard since I first made it, so I just portioned it out into muffin tins and voila cupcakes. Of course, being ambitious, I had to add a little surprise - a cream filling. And top it with a rich chocolate buttercream. Now, those were good. Devoured by the shower guests. But then I had to go and make them better. I found a new sinfully delicious chocolate fudge frosting. And then I made them again and again as people went "OMG CUPCAKES!"
Disclaimer: You will not eat just one. In fact you'll be hard pressed to stop at two. I am in no way liable for any weight gain or cavities resulting from this recipe. They are not low-fat or low-sugar or low-calorie. They are however absolutely addictive and delicious.
This really is my favorite cake recipe. There's no butter to soften, which means you can whip it up in no time flat. And it avoids a lot of the creaming pitfalls. The frosting is so simple that I had it memorized after making it twice. It's pretty hard to screw up. However, it is a bit time consuming and there are quite a few different pieces to the puzzle. I use my mixer for all three components, so that means washing my bowl a couple times. It's worth the effort, I promise. You might never have a Hostess cupcake again after these.
Chocolate Fudge Cupcakes
Cake Batter
3/4 c Water
2 1/4 oz Cocoa Powder
12 oz Light Brown Sugar
3 fl oz Vegetable Oil (1/4 c + 2 tbsp)
2 Eggs
5 1/2 oz Flour
1 1/8 tsp Baking Powder
1 1/8 tsp Baking Soda
3/4 tsp Salt
1 1/2 tsp Vanilla Extract
3/4 cup Milk
Filling
1 cup Heavy Whipping Cream
1/4 cup Powdered Sugar
1 tsp Vanilla
Frosting
1 cup Heavy Whipping Cream
6 oz Chocolate Chips (I use semi-sweet, but whatever is your favorite.)
1 lb Powdered Sugar (approximately)
2 piping bags (I use disposable plastic ones) and 2 star tips
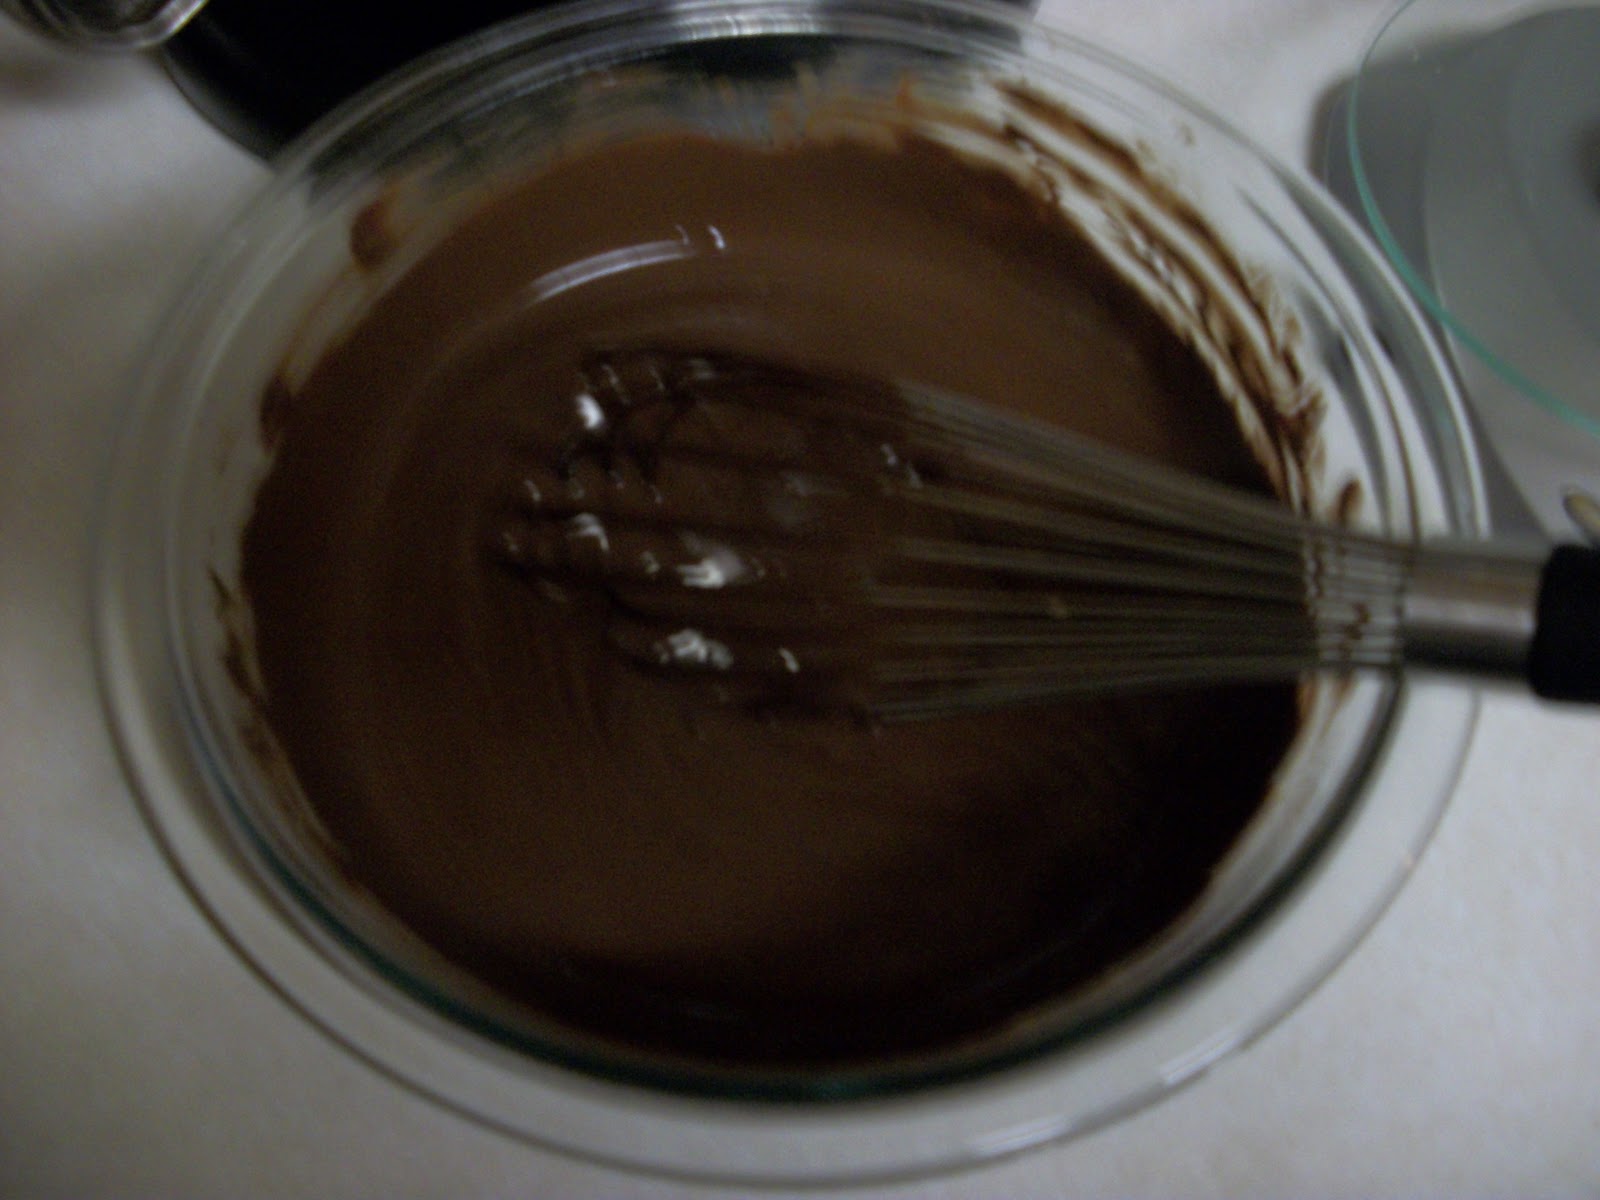
First, heat the water to boiling. I use a Pyrex measuring cup so I just zap it in the microwave for 2-3 minutes. Put the cocoa powder in a bowl (stainless steel or glass, please), and whisk in the boiling water. It should be really smooth with no clumps, and it'll look the consistency of melted chocolate. Now set aside this mixture to cool down while you assemble everything else.
Place the brown sugar and the oil in your stand mixer. Let it go ahead and mix up at a nice medium speed. Break the eggs into a bowl and lightly beat them together. Give the sugar mixture a quick scrape then turn it on low, adding the eggs slowly. They should be well incorporated. Mix together the flour, baking powder and soda, and salt. Stir the vanilla into the milk. You're going to alternate flour and milk additions - a third of the flour, half the milk, another third flour, the rest of the milk, then finish with flour. Scrape frequently and go slowly to create a smooth batter. Now that the flour is in don't just let the mixer run - too much mixing will create a tough cake.


Now we have a nice batter. Looks almost like butterscotch. But it's not chocolate yet. So turn your mixer on low and drizzle in that chocolate mixture we made in the beginning. Scrape the bowl and mix just until it's completely blended.


This is a very very loose batter. Don't worry, you didn't screw up, it's supposed to look like this. Pop some liners into your muffin tins and now it's time to portion. I'm a fan of dishers to give me an even amount of batter, though it can be tricky with this recipe. I used my large Oxo cookie scoop, one scoop per cupcake. Another easy way would be to pour the batter into a measuring cup (or anything with a spout) and divide it out that way. You're going to bake these at 350 degrees for about 20-22 minutes. Halfway through, flip the pans - top to bottom, bottom to top, and also rotate them 180 degrees. Standard toothpick test for checking if they're done, a few crumbs on the toothpick are ok though. Don't overbake. Let them cool slightly, then pop them out of the pans onto a cookie sheet and refrigerate until cold.

They are not going to be very tall. It's just not a very puffy recipe, and especially after they cool they end up pretty flat. But that just calls for more frosting, right?

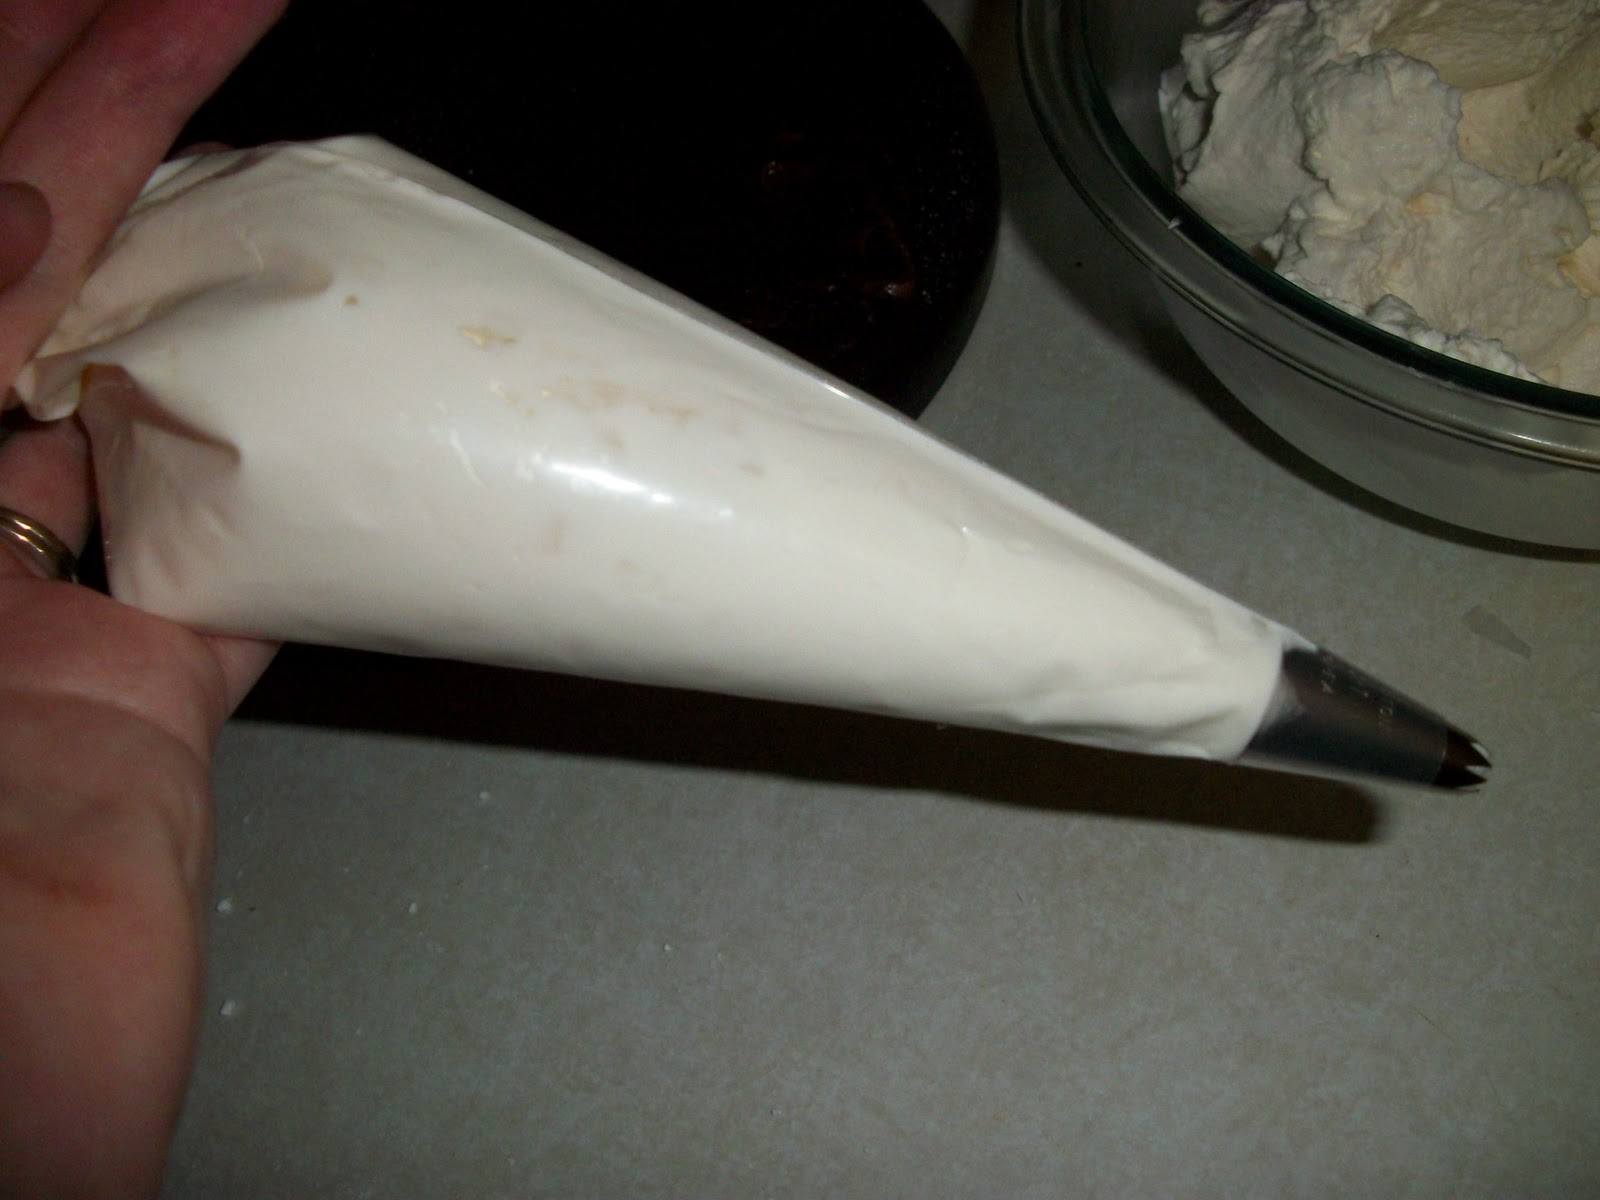
Now prepare the filling. It's just fresh whipped cream, and trust me once you taste it you'll never go back to Cool Whip. For best results, chill your bowl and whisk attachment, and make sure the cream is nice and cold. Just add cream, sugar, and vanilla into the bowl and beat at a medium speed until frothy and starting to thicken. Once it has some body to it, turn that mixer up to high. We're looking for stiff peaks, but beware! Stiff peaks can very quickly turn into butter if you're not watching. So please do not take your eyes off of it. I tend to stop it when peaks just start to appear to give it a quick taste test. Here's where you can add some more sugar or another splash of vanilla if you feel like it. It's better to add less to start with, you can always add more now but you can't take it out if it's too sweet. When you're done stick it back in the fridge so it stays nice and chilly.

Last item to prepare is the frosting. Heat the cream in a saucepan - if you have one with a rounded bottom use that, it's better for whisking. The cream should just barely simmer, once you start to see some ripples or a skin to the top pull it off. Dump in your chips and start whisking, and don't stop until it's completely smooth. Have an ice bath ready - a bowl bigger than your saucepan half full of ice water. Place the pan in the ice bath and whisk until it's nice and cold. It'll take a little bit. Now you have a choice for adding the sugar: hand whisking or mixer. I chose the mixer. Transfer it to your mixing bowl and set it on a medium-low speed, slowly adding in your powdered sugar. Stop it every once in a while for a good scrape. How much sugar you add is up to you and your needs and tastes. The more you add the thicker the frosting will be, and depending on what chips you started with you might want it sweeter. After you get the flavor where you want it, turn it up higher for a bit to really whip it and give it some volume for a fluffy frosting. If you give it a chill in the fridge before that final whip it'll have a little better texture, but not necessary.
All right, now we have all our pieces ready to go. Fit a piping bag with a star tip (I have a #32 Wilton tip) and fill with whipped cream.

Now stick the tip down into the center of a cupcake, until almost the top of the metal tip. Squeeze very gently and slowly, for only a few seconds. The top of the cupcake will start to rise, but don't go overboard or it'll crack. It won't take much at all.

You now have a filled cupcake. Go ahead and finish off the batch. You might have whipped cream left over, but that's what spoons are for. Also delish with fresh strawberries.
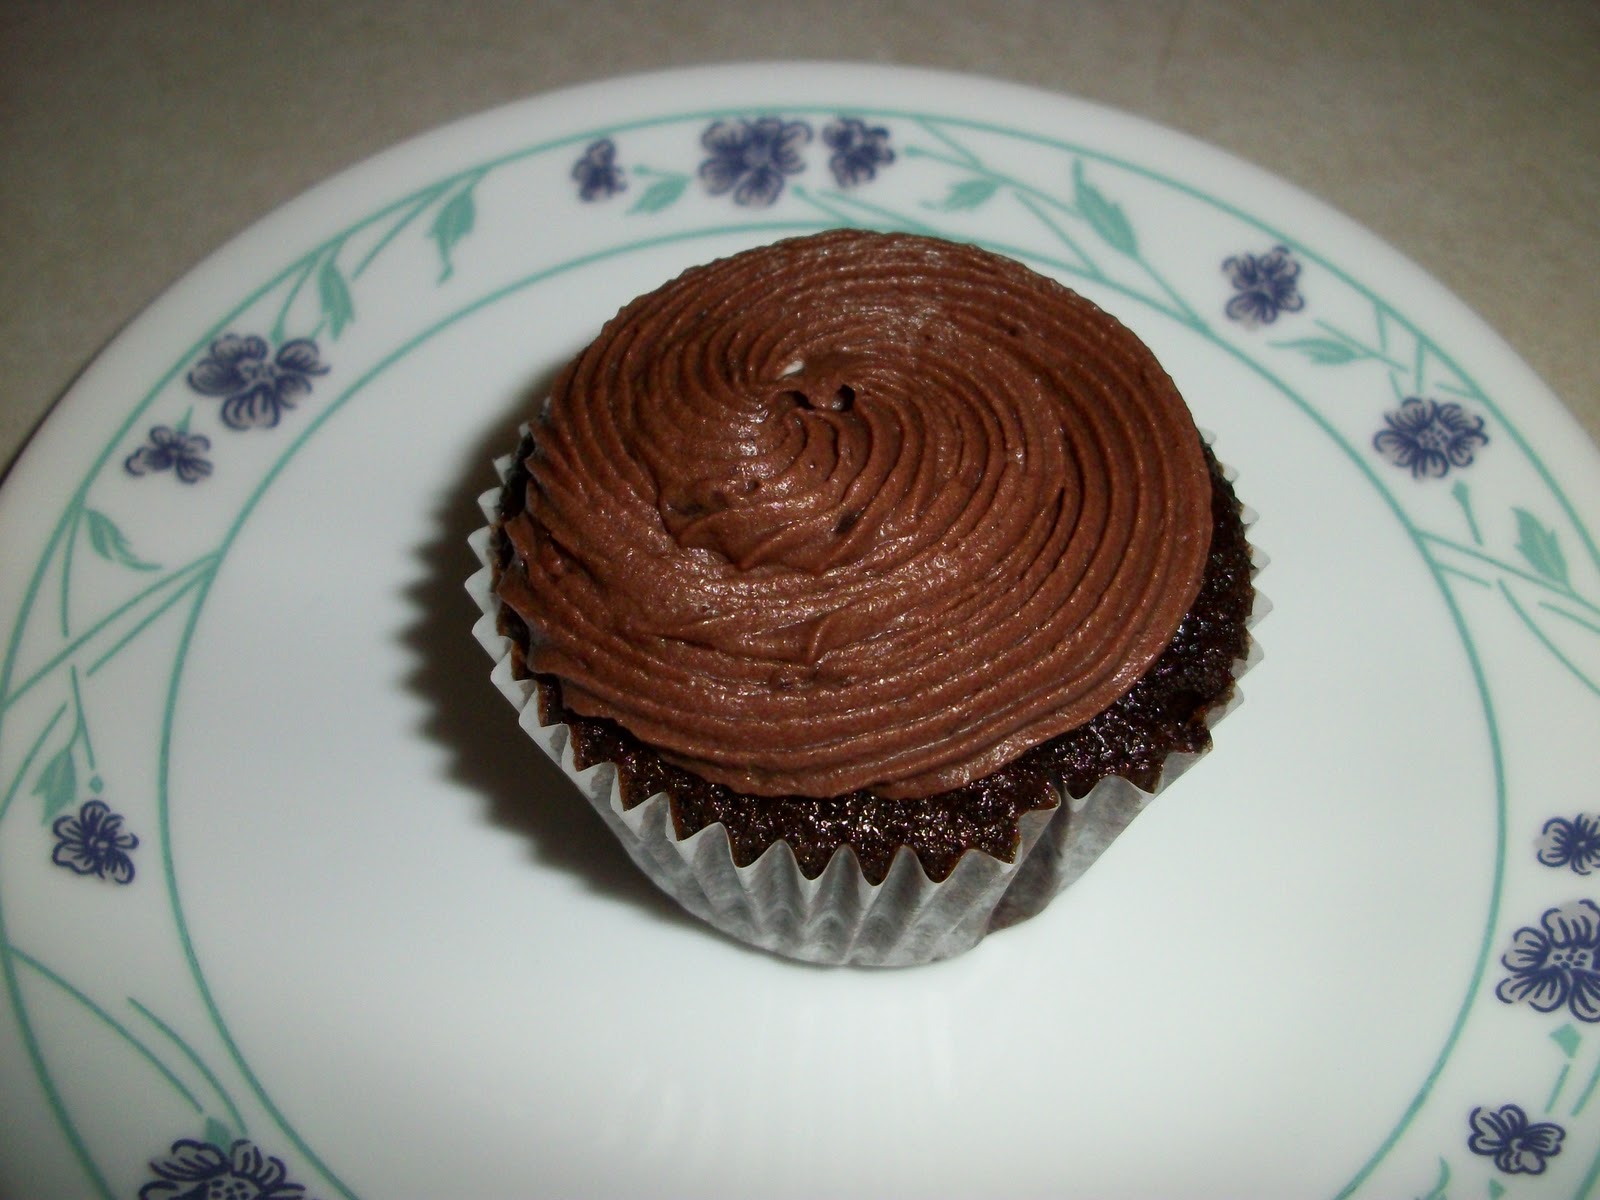
The final step is frosting. I use the same size star tip for the frosting, but a bigger one also looks really nice on cupcakes. Work from the outside to the center, just spiral in slow and steady. Keep the pressure on the piping bag as even as you can.

Enjoy.
No comments:
Post a Comment