Welcome to MJ's Bakery!

I make everything from scratch using fresh, quality ingredients. No additives, no hydrogenated oils, no funny stuff. You can't beat real hand-made goodness. Check out the products page for a full list of yummy desserts available. Contact me to discuss your needs, big and small! I am located in the Kansas City metro area, and am happy to meet with you and deliver your product to you anywhere in the area. Thank you for considering me for all your sweet tooth desires!

Monday, October 18, 2010

Chocolate Fudge Cupcakes


I've made this recipe about a bajillion times by now, they've quickly become a signature item of mine and have been requested at a lot of my functions. Back in January I was given a baby shower, and I decided to make some cupcakes for it. This chocolate cake recipe had been my standard since I first made it, so I just portioned it out into muffin tins and voila cupcakes. Of course, being ambitious, I had to add a little surprise - a cream filling. And top it with a rich chocolate buttercream. Now, those were good. Devoured by the shower guests. But then I had to go and make them better. I found a new sinfully delicious chocolate fudge frosting. And then I made them again and again as people went "OMG CUPCAKES!"

Disclaimer: You will not eat just one. In fact you'll be hard pressed to stop at two. I am in no way liable for any weight gain or cavities resulting from this recipe. They are not low-fat or low-sugar or low-calorie. They are however absolutely addictive and delicious.

This really is my favorite cake recipe. There's no butter to soften, which means you can whip it up in no time flat. And it avoids a lot of the creaming pitfalls. The frosting is so simple that I had it memorized after making it twice. It's pretty hard to screw up. However, it is a bit time consuming and there are quite a few different pieces to the puzzle. I use my mixer for all three components, so that means washing my bowl a couple times. It's worth the effort, I promise. You might never have a Hostess cupcake again after these. 

Chocolate Fudge Cupcakes 

Cake Batter
3/4 c Water
2 1/4 oz Cocoa Powder
12 oz Light Brown Sugar
3 fl oz Vegetable Oil (1/4 c + 2 tbsp)
2 Eggs
5 1/2 oz Flour
1 1/8 tsp Baking Powder
1 1/8 tsp Baking Soda
3/4 tsp Salt
1 1/2 tsp Vanilla Extract
3/4 cup Milk

Filling
1 cup Heavy Whipping Cream
1/4 cup Powdered Sugar
1 tsp Vanilla

Frosting
1 cup Heavy Whipping Cream
6 oz Chocolate Chips (I use semi-sweet, but whatever is your favorite.)
1 lb Powdered Sugar (approximately)
2 piping bags (I use disposable plastic ones) and 2 star tips

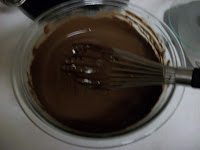
First, heat the water to boiling. I use a Pyrex measuring cup so I just zap it in the microwave for 2-3 minutes. Put the cocoa powder in a bowl (stainless steel or glass, please), and whisk in the boiling water. It should be really smooth with no clumps, and it'll look the consistency of melted chocolate. Now set aside this mixture to cool down while you assemble everything else.


Place the brown sugar and the oil in your stand mixer. Let it go ahead and mix up at a nice medium speed. Break the eggs into a bowl and lightly beat them together. Give the sugar mixture a quick scrape then turn it on low, adding the eggs slowly. They should be well incorporated. Mix together the flour, baking powder and soda, and salt. Stir the vanilla into the milk. You're going to alternate flour and milk additions - a third of the flour, half the milk, another third flour, the rest of the milk, then finish with flour. Scrape frequently and go slowly to create a smooth batter. Now that the flour is in don't just let the mixer run - too much mixing will create a tough cake.


Now we have a nice batter. Looks almost like butterscotch. But it's not chocolate yet. So turn your mixer on low and drizzle in that chocolate mixture we made in the beginning. Scrape the bowl and mix just until it's completely blended. 


This is a very very loose batter. Don't worry, you didn't screw up, it's supposed to look like this. Pop some liners into your muffin tins and now it's time to portion. I'm a fan of dishers to give me an even amount of batter, though it can be tricky with this recipe. I used my large Oxo cookie scoop, one scoop per cupcake. Another easy way would be to pour the batter into a measuring cup (or anything with a spout) and divide it out that way. You're going to bake these at 350 degrees for about 20-22 minutes. Halfway through, flip the pans - top to bottom, bottom to top, and also rotate them 180 degrees. Standard toothpick test for checking if they're done, a few crumbs on the toothpick are ok though. Don't overbake. Let them cool slightly, then pop them out of the pans onto a cookie sheet and refrigerate until cold.


They are not going to be very tall. It's just not a very puffy recipe, and especially after they cool they end up pretty flat. But that just calls for more frosting, right? 


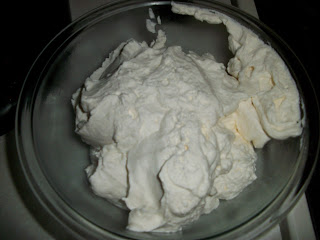
Now prepare the filling. It's just fresh whipped cream, and trust me once you taste it you'll never go back to Cool Whip. For best results, chill your bowl and whisk attachment, and make sure the cream is nice and cold.  Just add cream, sugar, and vanilla into the bowl and beat at a medium speed until frothy and starting to thicken. Once it has some body to it, turn that mixer up to high. We're looking for stiff peaks, but beware! Stiff peaks can very quickly turn into butter if you're not watching. So please do not take your eyes off of it. I tend to stop it when peaks just start to appear to give it a quick taste test. Here's where you can add some more sugar or another splash of vanilla if you feel like it. It's better to add less to start with, you can always add more now but you can't take it out if it's too sweet. When you're done stick it back in the fridge so it stays nice and chilly. 


Last item to prepare is the frosting. Heat the cream in a saucepan - if you have one with a rounded bottom use that, it's better for whisking. The cream should just barely simmer, once you start to see some ripples or a skin to the top pull it off. Dump in your chips and start whisking, and don't stop until it's completely smooth. Have an ice bath ready - a bowl bigger than your saucepan half full of ice water. Place the pan in the ice bath and whisk until it's nice and cold. It'll take a little bit. Now you have a choice for adding the sugar: hand whisking or mixer. I chose the mixer. Transfer it to your mixing bowl and set it on a medium-low speed, slowly adding in your powdered sugar. Stop it every once in a while for a good scrape. How much sugar you add is up to you and your needs and tastes. The more you add the thicker the frosting will be, and depending on what chips you started with you might want it sweeter. After you get the flavor where you want it, turn it up higher for a bit to really whip it and give it some volume for a fluffy frosting. If you give it a chill in the fridge before that final whip it'll have a little better texture, but not necessary. 

All right, now we have all our pieces ready to go. Fit a piping bag with a star tip (I have a #32 Wilton tip) and fill with whipped cream. 


Now stick the tip down into the center of a cupcake, until almost the top of the metal tip. Squeeze very gently and slowly, for only a few seconds. The top of the cupcake will start to rise, but don't go overboard or it'll crack. It won't take much at all. 


You now have a filled cupcake. Go ahead and finish off the batch. You might have whipped cream left over, but that's what spoons are for. Also delish with fresh strawberries. 

The final step is frosting. I use the same size star tip for the frosting, but a bigger one also looks really nice on cupcakes. Work from the outside to the center, just spiral in slow and steady. Keep the pressure on the piping bag as even as you can. 


Make sure to store these in a refrigerator. If you have a covered container they'd fit in that's best. Do not put plastic wrap over them when the frosting is fresh, it will just smudge. Let it harden for an hour or two before wrapping.


Enjoy.

Friday, October 15, 2010

Classic Apple Pie: Take 1

Ah, September. Here in Kansas it went from summer to fall in 9.2 seconds, but at least it's still here. I love the smell of fall. There's always a scent of woodsmoke to the air, and it's moist and rainy outside. Then there's the squash and pumpkins everywhere. And my personal favorites, apples. Specifically, Honeycrisp apples. Now, most varieties are available year round. But the delectable and distinct Honeycrisp comes around only in autumn it seems. And my favorite dish, apple pie, really shows its true colors when this apple is added to the mix. I'll make apple pie any time of year, but fall is when it is the best. 


Apple pie has been a bit of a quest for me. The quintessential American dish, it is one of my favorite challenges. After perfecting my chocolate chip cookies, I turn to this pie to hone my skills. There are just so many components to it, while not hard to make a good apple pie it's difficult to make a truly great one. There's the balance of sweet and spicy in the filling, making it juicy but not runny, apples tender but not mushy. And then there's the crust, which I admit still eludes me somewhat. And no, my version is not quick, there's a lot of chilling and such involved. But it's still a good pie. So here are the results of my latest experiment, a rather successful one but still missing a little something. Look for an update later in the fall, when I try my hand at it again. 

Classic Apple Pie 


Crust
12 oz Flour
1 tsp Salt
1 tbsp Sugar
6 oz Butter, chilled and cut into pieces (1.5 sticks)
2 oz Shortening, chilled and cut into pieces
3 tbsp Applejack Brandy
3 tbsp Cold Water


Filling
2 each Granny Smith, Honeycrisp, and Golden Delicious apples
1-2 tbsp Cider Vinegar
4 oz Light Brown Sugar
2 oz Granulated Sugar
1 oz Flour
1/2 tsp Cinnamon
1/4 tsp Nutmeg
1/8 tsp Ground Clove
1/8 tsp Ground Allspice
1/4 cup Apple Cider
4 tbsp Butter
1-2 tbsp heavy cream or milk


For the crust, measure the dry ingredients into the bowl of a food processor. Pulse a few times to mix. Add the butter, pulsing 4-6 times. Add shortening, pulsing another 4-6 times. Mixture should be very crumbly. Drizzle in the liquids, then pulse until it starts to come together. Be careful not to overwork the dough. Divide in half by weight, working each part into a disk and wrapping in plastic wrap. Refrigerate until firm, several hours. This also allows time for the flour to hydrate. 


<--Applejack, ask for it at your friendly neighborhood liquor store. I promise it's the only hard to find ingredient in this recipe, but it does add a ton of flavor to the crust, and per Alton Brown helps avoid too much gluten production. Now, I do mix it with water because it can be a bit strong and does end up with a bit of a crumbly crust.

Dry ingredients plus cold butter         After pulsing, it's crumbly


Now we add the shortening                And some more pulsing


Now we have some liquid, careful here now to now overwork the dough. It should just come together. Turn it out and make a ball. Divide in half by weight, forming each half into a disk and covering in plastic wrap. 


And the finished product, two equal portions of pie dough wrapped and ready to chill. 

Now the dough is chilling, time to make the filling!


Left to right: Granny Smith, Golden Delicious, and Honeycrisp

These are my favorite apples. Gives a nice balance of sweet and tart, and all have a good texture to them. Feel free to mix it up, though I'd stick with those recommended for baking. And also try and keep the amount of each variety balanced. 

To start the filling, fill a big bowl with cold water and a good splash of the vinegar. Lemon juice is traditional here, but it makes the pie too tart, and lemon does not belong in an apple pie. Cider vinegar will still keep your apples from browning, plus boost that yummy apple flavor. Now, start peeling and cutting your apples. A good vegetable peeler will do the trick, or a paring knife if you prefer. I tend to peel the whole apple before cutting. 


Cut in half, then in quarters. Then cut out the core on a diagonal. I then cut each quarter into four again, so I get sixteen pieces from each apple. I've found that keeps the slices thin enough to cook well. Put the slices into the water as you go.

When you're done with all the apple prep, drain them in a colander. Meanwhile, mix together the sugars, flour and spices. Combine apples, sugar mix, cider, and butter in a big pot. Cook until the mixture turns thick and gooey, and the apples start to become tender. Shouldn't take too long, and don't cook the apples all the way through. 


Doesn't this look delicious by itself?


Now, patience. The pie filling needs to go in a bowl and in the fridge (uncovered). If you put hot filling in an unbaked crust you end up with soggy crust. So let it chill long enough to be cool. Now time to assemble the pieces.

Remove the pie dough from the fridge. A couple of minutes on the counter will take the chill off and make it more pliable. Now get two good sized pieces of wax or parchment paper. Sprinkle one generously with flour, put on a disk of dough, then add more flour on top of that. Place the second sheet of paper on top of the dough and set to work with a rolling pin. Roll from the center out, rotating every few strokes or so. The crust will be fairly thin, and make sure it's big enough to fit your pie pan. I use a Pyrex 9" plate. When you're done rolling, remove the top piece of paper, flip over the pan, and then peel off the bottom piece of paper. Gently tuck the dough down into the pan, smoothing it out and making sure there's no big bubbles of air. Now you can just heap the prepared filling in the middle, spreading it out fairly evenly but letting it dome up in the middle.


Now repeat paper procedure with the second piece of dough, adding 6-8 slits in the crust before moving it on top of the pie. Peel off paper and trim edges with a butter knife. I just crimp mine with a fork, I haven't mastered any of the fancier finishing techniques.  


And there you have it, a fully assembled pie. You did preheat the oven to 400 degrees and get a cookie sheet, didn't you? A final few touches before that pie hits the heat.


Brush the top of the pie with the cream or milk. I prefer cream, but if you have none handy just use milk. If you really have strong feelings, use an egg wash (one beaten egg with a tsp of water) but I don't care for it. Then sprinkle with a little bit of granulated sugar. Then add a ring of aluminum foil or one these nifty pie rings (like $5 at BB&B, go get one.)


Voila, an apple pie. Time to bake! 

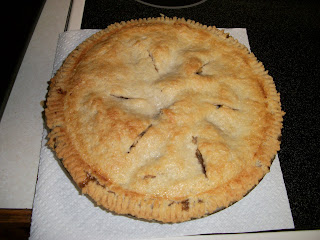
Mine took about an hour, but it will depend on your oven and other factors. I'd check it at 30 min, then frequently after 45 min. Crust should be a nice golden brown and you should see the filling bubble up in the slits. (Or drip onto the handy cookie sheet if you don't crimp your edges well, like I'm guilty of.)


Sweet, delicious apple pie. If I was thinking of it I should have gotten a picture of a slice, but whoops. 
Just take my word for it, it looked nice. And was tasty.